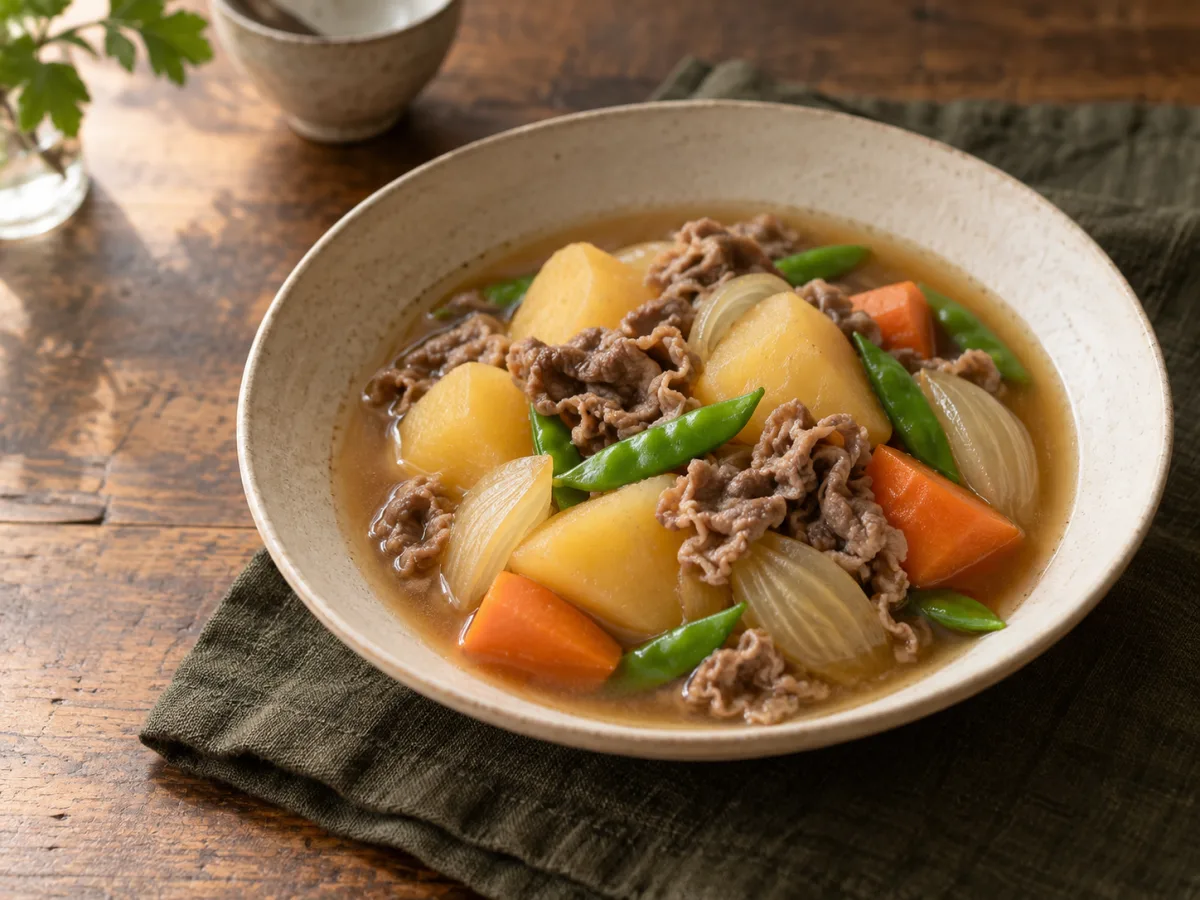
Nikujaga
Japanese beef and potato — thin-sliced beef, potatoes, onion, and carrot in a sweet-savoury broth of soy, mirin, sake, and sugar. The potatoes and vegetables are pressure cooked; the beef is poached into the finished broth afterwards.
Status: untested. Read PREREAD.md first for cooker operation, salt calibration, and the cooling routine.
6 servings. Uses one 180 ml portion of chicken-stock.md instead of the 3/4 cup of water, never in addition.
Read this before you commit
This is the odd one out in the folder, in three ways worth knowing up front.
- It is the leanest dish here by a wide margin. No butter, no cream, no oyster sauce, no browning. Every other recipe in this collection buys back the depth it lost by not searing, and buys it with fat. Nikujaga can’t do that without ceasing to be nikujaga — the broth is supposed to be light enough to drink.
- The beef never sees pressure. That’s a real departure from the folder’s method, and the reasoning is below. It also means this is a two-stage recipe on one appliance rather than the usual dump-and-go.
- There is no dashi, because this folder has chicken stock. That substitution changes the dish more than the ingredient list suggests, and it gets its own section.
None of that makes it a bad fit — it lands squarely in the sweet-savoury East Asian branch, andPREREAD.mdnames sukiyaki, which is the same soy-mirin-sugar-sake base, as a working reference point. It’s just a dish that asks for decisions the other recipes never ask for.
Ingredients
For the pressure cook
- One 180 ml portion of chicken stock — see
chicken-stock.md. Straight in frozen; this pot takes long enough to reach pressure that thawing is wasted effort. - 6 tbsp Datu Puti soy sauce, plus 1 tbsp held back for the finish
- 4 tbsp mirin
- 3 tbsp sake, or any dry rice wine
- 2 tbsp sugar
- 700 g potatoes (about 4 medium), peeled and cut into large 4 cm chunks
- 2 medium onions (~300 g), cut into wedges through the root so they hold together
- 1 large carrot (~150 g), cut into rough 2–3 cm chunks
To add after pressure - 1 kg beef chuck sliced 2–3 mm thick — sukiyaki or shabu-shabu cut. Not cubes.
To finish, off heat - The reserved 1 tbsp soy sauce, to taste
- 150 g snow peas or green beans, microwaved separately per
PREREAD.mdand stirred in at serving (optional)
Optional, and traditional - 200 g shirataki / ito konnyaku, drained and rinsed well — add with the beef, not under pressure. It never softens and never falls apart, so it survives storage better than anything else in the pot.
Method
- Sauté on. Mirin and sake in first, on their own. Bring them to a boil and hold it 1–2 minutes to drive the alcohol off. See the alcohol section below for why this step isn’t optional here.
- Sauté OFF. Per
PREREAD.md, never lock the pressure lid while Sauté is running. - The rest of the liquids in. Stock, 6 tbsp soy, sugar. Stir until the sugar is completely dissolved and nothing gritty is sitting on the base.
- Solids on top. Onion wedges, potatoes, carrot. No beef. Do not stir again.
- Lid on, valve seated. Meat/Stew, then Pressure Time to 8 minutes.
- Let pressure drop fully on its own — expect only 12–15 minutes here, less than the chicken recipes, because there’s no meat in the pot yet. Turn Keep Warm off.
- Taste the broth now. This is the only moment it’s unmasked, before a kilo of unseasoned beef dilutes it.
- Ladle out excess liquid if you have it — see
PREREAD.md. Ladle, don’t boil down. The broth is part of the dish and the seasoning is already where you want it; ladling removes volume without changing concentration, which is exactly the tool this recipe wants. - Sauté on, and add the beef. Separate the slices as they go in so they don’t weld into a block. Cook until no red remains, skimming the grey scum that rises. Read the note below on how long this actually takes.
- Sauté off. Reserved soy in, to taste. Rest the lid on unlatched and leave it 10–15 minutes before portioning.
- Stir the microwaved greens in at serving, not before.
Roughly 60 minutes elapsed: ~15–20 to reach pressure, 8 cooking, ~12–15 releasing, ~10 for the beef stage, then the rest.
Why the beef goes in after the pressure stage
This is the load-bearing decision in the recipe, and it runs against the folder’s habit of putting the meat in at the start.
Pressure cooking solves a problem thin-sliced beef doesn’t have. The Dowell’s job is collagen conversion — turning tough connective tissue into gelatin, which needs time at temperature. Chuck in 4 cm cubes needs 35 minutes because heat and moisture have to work their way to the centre of each cube and stay there. The same chuck sliced to 2 mm has almost no distance to cover: it cooks through in under a minute in hot liquid, and whatever collagen it contains softens in that time simply because there’s so little of it in any one slice.
What pressure does to it instead is destroy it. Muscle fibres contract and squeeze out moisture as temperature rises, and at 115 °C for eight minutes a 2 mm slice has nothing left to lose. It goes from meat to dry grey strings, and then those strings curl and mat together. There’s no graceful failure here of the kind thighs have — overcooked thigh just shreds and is still good. Overcooked shabu beef is a texture you throw away.
bulgogi.md reaches the same conclusion from the other direction and warns against pressure cooking thin beef outright. Treat that as the general rule for this cut across the folder; this recipe is the case where you still want the pot, just not for the beef.
What you lose by holding it back, honestly: the broth. In a real nikujaga the beef goes in early, renders its fat, and gives the simmering liquid its character — the dish is named beef-and-potato in that order for a reason. Poaching the beef in at the end gets you correct beef and a broth that tastes mostly of stock, soy, and onion. Three things narrow that gap:
- Use a fatty cut. Sukiyaki-cut chuck or short plate, not lean topside. The fat renders during the poach and gives the broth its sheen even at the late stage.
- The chicken stock is doing this job. A gelled stock puts back body and savouriness the beef would otherwise have contributed. This recipe is more dependent on the stock actually being good than any other file here.
- Don’t skim too hard. See the storage section.
How long the beef stage really takes
Expect 8–12 minutes on Sauté, not 3. You are dropping a kilo of cold beef into a pot holding maybe 1.3 kg of hot food, and the Sauté function is weak. Simple arithmetic on the mixing puts the pot somewhere near 55 °C the moment the beef lands, and Sauté has to climb back from there.
Two ways to handle it, matching the pattern used elsewhere in the folder:
Simplest: all the beef in at once, lid resting on unlatched, Sauté on, stirred once or twice, 8–12 minutes. The first slices in are somewhat overcooked by the time the last ones are done. Perfectly edible, and this is the meal-prep-friendly choice.
Better texture, more attention: bring the pot back to a bare simmer empty of beef first, then add the beef in three or four handfuls, lifting each out to a bowl as it turns from red to grey-brown — 60–90 seconds each. Return everything at the end. This is the shabu approach and it’s genuinely better, at the cost of standing over the pot.
Either way, take the beef out of the fridge while the pot is depressurising. Same reasoning as the thawing note in rosemary-chicken.md: cold mass in an already-marginal heat source costs you more than it looks like it should. And don’t chase a rolling boil — 80 °C cooks a 2 mm slice fine, and a hard boil is what toughens it.
The dashi problem
Authentic nikujaga is built on dashi, and dashi is not a generic stock. It’s kombu and katsuobushi, which between them supply glutamate and inosinate — two different umami compounds whose combination tastes several times stronger than either alone. It’s also nearly fat-free, nearly gelatin-free, and clean-tasting to the point of being austere. That austerity is the dish’s whole character: a thin, clear, drinkable broth that tastes intensely savoury while weighing nothing.
Chicken stock is the opposite kind of ingredient. It brings gelatin, rendered fat, and roast-chicken aroma. Used here it gives you a rounder, heavier, slightly cloudy braise. Be clear about what that means: it is a good result and the wrong result. The dish will taste rich rather than clean, and the specific bright savouriness that makes nikujaga distinctive is the part you won’t get.
Is dashi against the flavour rules? No, and it’s worth saying so plainly rather than assuming. PREREAD.md excludes fermented-fish seasonings, and names bagoong and heavy patis — the objection there is funk and pungency. Katsuobushi isn’t that; it’s dried and smoked, and dashi reads clean rather than fishy. The reason this recipe uses chicken stock is availability and the folder’s existing infrastructure, not a rule.
So the upgrade path is real, and it’s cheap. Ranked:
- A piece of kombu, 10 x 10 cm, dropped in with the liquids and pulled out before serving. This is the highest-value change available. It’s a dried leaf, it keeps indefinitely, it contributes glutamate and nothing else, and it stays entirely inside the folder’s flavour rules. It doesn’t make the stock into dashi, but it puts back the half of dashi that does the most work in a sweet-savoury braise.
- A dashi packet or instant dashi powder in place of the chicken stock, made up to 180 ml. Closest to the real thing. Read its label — instant dashi is salted, often heavily, and the soy below assumes an essentially unsalted liquid.
- A pinch of MSG. Blunt, effective, and honest about what it’s replacing.
Don’t use a lemon-and-thyme stock in this one.chicken-stock.mdranks per-recipe fit for a citrusy batch, and this recipe belongs at the bottom of that list — there’s no cream, no Worcestershire, and no pepper here to bury an acid note, and the flavour family excludes sour precisely because a thin sweet-savoury broth shows it up. Save that batch for the rosemary recipes.
Salt, sugar, and the alcohol
Salt. The pot weighs roughly 2.5 kg loaded. At PREREAD.md’s 0.8% target that’s about 20 g of salt equivalent, and essentially all of it has to come from soy — mirin and sake carry almost none, and the stock contributes around 0.5 g, which chicken-stock.md tells you to ignore on a first attempt. Seven tablespoons of Datu Puti at 2.65 g each gets you there.
Six go in and one is held back, for two reasons. The kilo of beef arrives unsalted after the pressure stage and drops the whole pot’s salinity by about a fifth, so the honest moment to make the final call is after it’s in. And salt has to be in the pot before pressure to reach the middle of a potato chunk — the same point rosemary-chicken.md makes about marble potatoes — so six is a floor rather than a cautious start.
Expect it to read milder than the number suggests. Sugar suppresses perceived saltiness, and there’s a lot of sugar here. This will not taste like the pepper-forward braises at a similar salinity, and that’s correct.
Sugar. Two tablespoons of sugar plus 4 tbsp mirin — mirin is roughly 40% sugar, so the real total is around 50 g, close to 2% of the pot, before the onions add their own. That’s the sweet-savoury register PREREAD.md describes as structural in this branch, and it is the reason there is no black pepper in this recipe at all. Pepper here would be money spent on something you cannot taste.
Scorch risk is higher than anywhere else in this folder, because nothing else here contains sugar. PREREAD.md’s loading rule — liquids first, solids on top, don’t stir again — exists to keep thick sweet things off the base, and it matters more in this branch than in the pepper-forward one. Make sure the sugar is fully dissolved before the vegetables go on top of it.
The alcohol is a genuine pressure-cooker problem. Sake and mirin are normally added to an open pot where the alcohol flashes off in a minute or two, and Japanese recipes assume that. A sealed pressure cooker never vents, so whatever alcohol you put in is still there when you open it, and 3 tbsp of sake plus 4 tbsp of mirin is enough to read as raw and solvent-like. Boiling them off first — nikiri, step 1 — is a 90-second fix and exactly the kind of small aromatic job PREREAD.md says the Sauté function is good for. Skip it and you’ll be reducing the finished broth to fix it instead, which throws away the light body you were trying to keep.
Vegetables — what PREREAD.md covers and what it doesn’t
Covered, and followed as written:
- Potatoes — quartered, in at the start, holding their shape at 8 minutes rather than dissolving as they do in the 35-minute beef recipes. That’s exactly the behaviour this dish wants.
- Onions — and this is the one recipe in the folder where the caution about onion doesn’t apply.
PREREAD.mdwarns against heavy onion because it dissolves, sweetens, and thereby suppresses black pepper. There is no pepper here and sweetness is the point, so the reason evaporates and the rule goes with it. Two whole onions is deliberate. Cut them through the root so some survive as wedges instead of all of them collapsing into the broth. - Snow peas and green beans — never in the pot, microwaved and stirred in at serving.
Not covered, so this is a judgement call to verify:PREREAD.md’s carrot guidance describes two cases, 35 minutes under pressure (they disintegrate) and 5 mm coins simmered on Sauté (they hold and absorb sauce). It doesn’t describe the 8-minute pressure case. The call here is 2–3 cm chunks in at the start, on the grounds that the exposure is close to what leaves potatoes intact and nikujaga wants substantial carrot rather than coins. Record how they came out. If they’re mush, the fallback is the documented one — thin coins simmered in during the beef stage instead.
The potato starch, and the sauce you’re aiming for
The broth should stay loose. This is not a clinging sauce dish, and reducing it hard is a mistake even though every other recipe here benefits from it.
You will get some thickening whether you want it or not. The cut faces of the potato chunks slough starch under pressure, and stirring the beef in abrades them further, which is why a proper nikujaga broth is faintly cloudy and has a little body. That’s desirable. Three consequences:
- Stir gently at the beef stage. Hard stirring turns intact chunks into a starch slurry, and there’s no undoing that.
- You almost certainly don’t need a cornstarch slurry.
PREREAD.mdoffers it for thin sauces; here the potatoes have already done a version of the job. - It thickens further in the fridge and again on reheat, as gelatinised starch retrogrades and swells. Deliberately leave it looser than you think it should be, and expect to add a splash of water when you reheat.
Storage — the weakest freezer candidate in the folder
Follow PREREAD.md’s cooling routine exactly; nothing here changes it. Two things do differ afterwards.
Be sparing with the fat cap. PREREAD.md says to lift the solidified fat off the whole batch the next morning, and the reason given is that it’s what determines whether you still want portions 4, 5, and 6. That reason mostly still holds — but this dish has no butter, no cream, and no oyster sauce, so the rendered beef fat is the only fat in it. Take off most of the cap and stir a spoonful or two back, or keep it aside and add it at reheat. rosemary-chicken.md calls itself the thinnest richness backstop in the folder; this recipe takes that title, and it took it on purpose.
Potatoes freeze badly, and this dish is 700 g of potato. Freezing ruptures the cell walls and the starch retrogrades, so thawed potato comes back mealy and slightly grainy — never disastrous in a broth, but noticeably worse than day two out of the fridge. PREREAD.md tells you to freeze half on day one because six servings outlast the 3–4 day window, and that advice still stands as the safer of two imperfect options. Mitigate it where you can:
- Use waxy potatoes rather than floury ones. Lower starch, sturdier cell walls, better survival.
- Freeze the half you’d have eaten last, and eat the fresh half over three days.
- Shirataki, if you used it, is the one component that freezes perfectly. It has almost no cell structure to damage.
Reheat covered in the microwave. This is a saucy braise with nothing crisp in it, so the air fryer has no role here at any stage — which also makes this the rare recipe in the folder that gains nothing from the two-stage pattern.
Where this departs from a real nikujaga
Collected in one place, since the individual reasons are scattered above:
- Chicken stock instead of dashi. Rounder, heavier, less clean. The largest single change.
- The beef is poached in at the end rather than simmered from the start. Correct beef texture, weaker beef broth.
- No otoshibuta and no open simmer. A drop lid keeps a shallow, slowly reducing liquid in constant contact with everything above it, which is how a stovetop nikujaga concentrates and glazes. A sealed pot doesn’t reduce at all. You get a wetter dish with less concentrated seasoning, which the soy quantity partly compensates for.
- It’s about twice as meaty as the original. Nikujaga is a potato dish with beef in it; the folder mandates a kilo of meat for six. That’s a deliberate departure and it does change the balance.
- No garlic, which is strange for this collection. Nikujaga has none, and 15 whole cloves would push it toward the Korean side of the branch. If you want it, 4–6 whole cloves read as background sweetness and won’t fight the mirin — but know that you’re moving the dish.
Next-time improvements
Nothing yet — untested. After the first cook, record:
- Whether the carrot chunks survived 8 minutes, or should drop to coins simmered in at the beef stage.
- Whether the potatoes at 8 minutes were right, given the shorter natural release this pot gets compared with the chicken recipes.
- What the broth tasted like at step 7, before the beef went in, and how much of the reserved tablespoon of soy you actually used.
- How long the beef stage really took on Sauté, and whether the batch method was worth the attention.
- Whether the alcohol read as raw despite the nikiri step, or whether you could shorten it.
- How the frozen half’s potatoes came back compared with the refrigerated half.
- Whether it read as too lean without the fat cap stirred back.