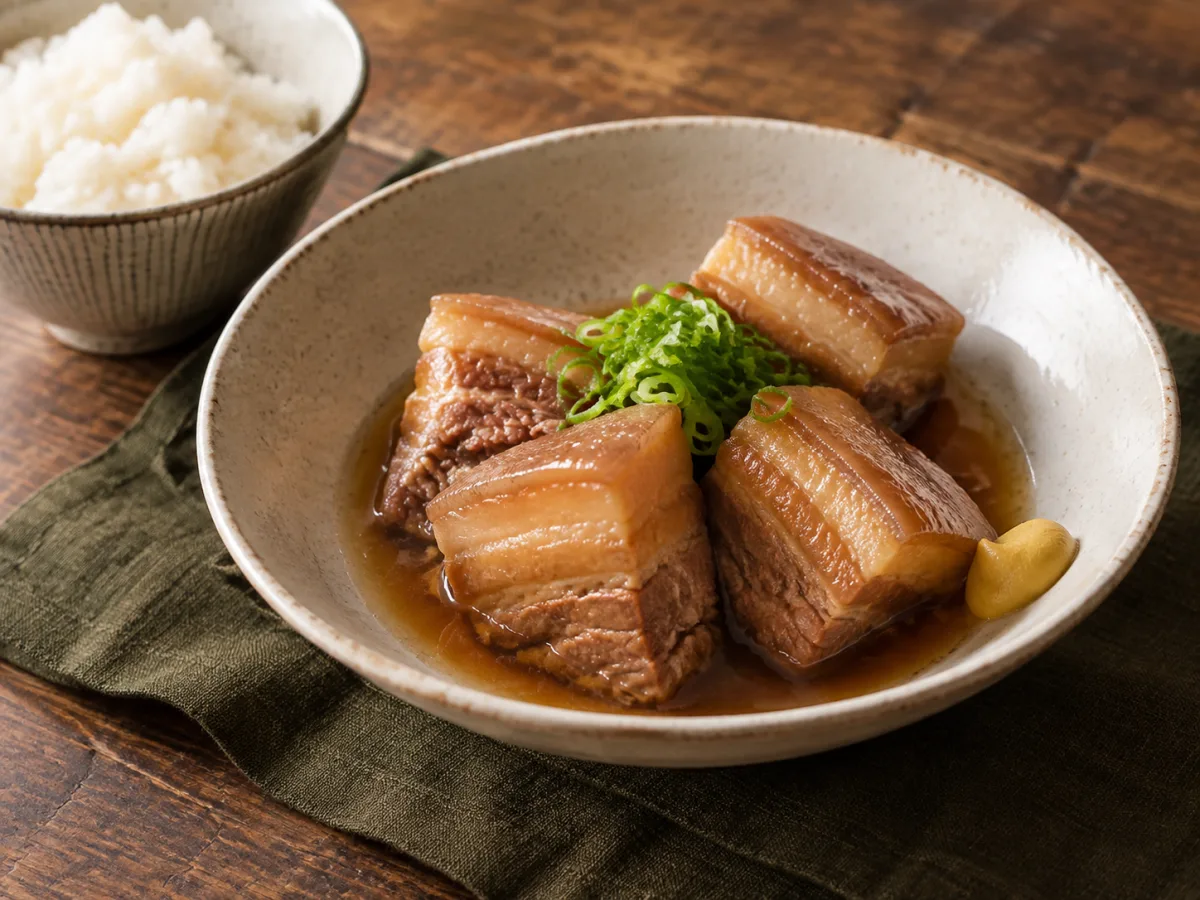
Buta no Kakuni (Japanese Braised Pork Belly)
Large cubes of pork belly blanched, then pressure braised in soy, mirin, sake, and ginger until they collapse under a chopstick. Glossy, clean, and much less spiced than hong-shao-rou.md.
Status: untested. Read PREREAD.md first for cooker operation, salt calibration, and the cooling routine.
6 servings, from 1 kg of pork belly. Best cooked one day and eaten the next.
Ingredients
For the blanch
- 1 kg pork belly, skin on, cut into 5 cm cubes
- Water to cover
- 1 thumb of ginger, sliced, and the green tops of 2 spring onions (optional, both go in the blanch water)
For the pressure cook - 1 x 180 ml portion of chicken stock, instead of the 3/4 cup of water, not in addition — see
chicken-stock.md - 3 1/2 tbsp Datu Puti soy sauce
- 3 tbsp mirin
- 3 tbsp sake
- 1 tbsp sugar
- 1 thumb of ginger, sliced into 6–8 coins
- 2 spring onions, cut into 5 cm lengths
To finish - 1 spring onion, green part sliced thin
- Karashi (Japanese hot mustard) at the table, optional
- Soft-boiled eggs — read the egg section before you plan around these
Method
- Blanch, in the pot. Cubes in, cold water to cover, ginger slices and spring onion tops in if you have them. Sauté on, lid off or resting unlatched. Bring to a boil and hold 5 minutes, skimming the grey scum. Drain, rinse the cubes, rinse the inner pot.
- Sauté OFF. Per
PREREAD.md, never lock the pressure lid while Sauté is running. - Liquids and seasonings first. Stock (a frozen block is fine), soy, mirin, sake, sugar. Stir once so the sugar is off the base.
- Solids on top. Pork cubes, ginger coins, spring onion lengths. Do not stir again.
- Lid on, valve seated. Meat/Stew, then Pressure Time to 30 minutes.
- Let pressure drop on its own — about 25–30 minutes. Never quick-release. Turn Keep Warm off.
- Cool and refrigerate per
PREREAD.md, cubes still sitting in their liquid. - Next morning, lift the fat cap off in one piece. Keep it; it is good pork fat.
- Pull the ginger and spring onion out. Reduce on Sauté, lid resting unlatched, for 5–10 minutes — much less than
hong-shao-rou.md. You want a light syrup that pools around the meat, not a lacquer. Return the cubes to warm through. - Spring onion greens over the top, a dab of karashi on the side, rice and something green from the microwave.
Day one is roughly 105 minutes: ~15 blanching, ~25 to reach pressure, 30 cooking, ~30 releasing, plus cooling. Day two is about 15.
What the pressure cooker replaces
Traditional kakuni is a two-to-four hour job: a long par-boil to render fat, then a gentle simmer in the seasoning liquid for hours, often with a drop lid, sometimes cooked and cooled over two days so the meat reabsorbs liquid as it cools.
That length exists for one reason — collagen conversion is slow at 95°C. Turning connective tissue into gelatin is a time-and-temperature trade, and an open pot cannot go above boiling. A sealed cooker runs at around 115–120°C, and the reaction roughly speeds up with every degree, which is why 30 minutes gets you where three hours of simmering would. PREREAD.md frames this as the Dowell’s whole purpose: it tenderises, and that is the thing it genuinely does better than anything else you own.
What pressure does not replace is the reduction. A three-hour simmer is also three hours of evaporation, which is where the traditional glossy clinging sauce comes from. A sealed pot evaporates nothing. So the sauce work has to be done deliberately at the end, on Sauté, in the open. That is step 9, and it is not optional.
It also does not replace the resting. The traditional overnight rest lets the cooled meat draw seasoned liquid back into itself. You get that for free here, because the folder’s cooling and storage routine already puts the meat in the fridge in its liquid overnight. This is one of the rare cases where the meal-prep constraint improves the dish rather than compromising it.
The par-boil: shortened, and why
Traditional kakuni par-boils the belly in plain water for one to two hours before the seasoned simmer even begins, sometimes in rice-washing water. This recipe replaces that with a 5-minute blanch, and the reasoning is worth stating because it is the biggest single departure in the file.
The par-boil has two jobs. It removes scum, blood, and the porky smell; and it renders a large amount of fat out of the belly so the finished dish is rich without being greasy.
- The first job is done by a 5-minute blanch. Scum comes out in the first few minutes of boiling. The extra ninety minutes are not buying more of it.
- The fridge makes rendered fat easy to remove, but it does not render fat that is still in the belly. Chilling the braising liquid lets you lift off what pressure cooking released. A long par-boil can render more before seasoning. The five-minute blanch is the ease-first version; use the longer fallback below if the finished belly is still too rich.
So the long par-boil is cut on the grounds that its reason no longer applies. The short blanch is kept because its reason does — it costs 15 minutes, it uses Sauté for the one thing Sauté is unambiguously good at, and it keeps the sauce clean and clear, which matters in a dish whose sauce is supposed to look translucent amber rather than muddy.
What you give up: a genuinely par-boiled belly is a little firmer and a little less rich, because more fat left before the seasoning went in. If your first batch reads too fatty even after the cap comes off, the fix is a longer blanch — 20–30 minutes on Sauté — rather than a shorter braise.
The eggs, honestly
The classic accompaniment is a soft-boiled egg marinated in the braising liquid, jammy orange yolk, halved on top. It is the best part of the dish in a restaurant, and it is the worst possible fit for meal prep. Do not plan the batch around it.
Why jammy yolks do not survive four days:
- Their quality declines. Refrigeration stops carryover cooking once the eggs are cold, but a cut or peeled soft egg still loses moisture and picks up the marinade unevenly. A dark rim comes from overcooking, not from days in the fridge.
- The marinade toughens the white. Salt draws water out and tightens the protein network. Twelve hours in soy is seasoning; four days in soy is rubber, with a hard, over-salted outer layer and a grey-brown stain a centimetre deep.
- You cannot reheat it. A soft yolk in a microwave either explodes or sets solid, and there is no gentle warming option on this equipment. So you would be eating it cold out of a warm bowl, which is fine once and tiresome by portion four.
- The safety margin is thinner. A runny yolk has not been held at a temperature that pasteurises it. Make soft eggs fresh, and use pasteurised eggs or fully set yolks for anyone at higher risk; do not invent a safe storage window from texture alone.
What to do instead — pick one: - Skip eggs in the batch and make them fresh. Two eggs at a time, in the Dowell on a trivet, and drop them into the sauce from whichever portion you are about to eat. They pick up plenty of flavour in an hour. This is the best answer and it costs almost nothing.
- Use hard-boiled eggs and accept a different dish. Firm yolks hold the full 3–4 days, take colour beautifully, and reheat without complaint.
lu-rou-fan.mduses exactly this and explains the method — 4 minutes at pressure on a trivet, full natural release. You lose the jammy centre and gain something that actually works as prep. - Freeze nothing with egg in it. Boiled whites go rubbery and weep after freezing, hard or soft.
How this differs from hong-shao-rou.md, and why the folder has both
They are the same technique — blanch, pressure braise a fatty cut in soy and sugar, chill, skim, reduce — with two different seasoning grammars. Knowing that is useful: once you have cooked either one you can build the other from the same base. What actually separates them:
- The alcohol. Shaoxing is amber, oxidised, and nutty, closer to dry sherry; it adds a savoury depth that reads distinctly Chinese. Sake is clean and comparatively neutral, and mirin brings sweetness plus gloss from its own sugars and amino acids rather than flavour of its own. Swap the alcohol and you have already moved most of the way between the two dishes.
- The spice, or the absence of it. Hong shao rou is star anise, garlic, and dark soy — warm, aromatic, unmistakably spiced. Kakuni has ginger and spring onion and nothing else. No five-spice, no anise, no garlic. That restraint is the dish’s identity, and adding garlic “because the folder likes garlic” turns it into a worse hong shao rou.
- The colour and the sauce. Dark soy makes the Chinese version opaque and near-black, and it gets reduced to a lacquer that coats. This one uses no dark soy, stays translucent amber, and gets reduced far less — the sauce is meant to pool around the meat and be spooned over rice, not to cling to it.
- The sugar level. 2 1/2 tbsp of sugar there against 1 tbsp plus mirin here. Kakuni is sweet but the soy leads; hong shao rou is sweet enough that sugar is arguably the lead.
- The finish. Hong shao rou gets an air-fry stage to tighten the fat and set a glaze. This one deliberately does not — see below.
- What each is for. Hong shao rou is intense and you eat a few cubes. Kakuni is milder and you can eat it repeatedly without palate fatigue, which makes it the better of the two for a run of weekday lunches. If you are cooking one of them for the first time, cook this one.
Why no air fryer, by default
It would work, and it is deliberately left out.
Kakuni’s target texture is uniformly soft. The whole point is a cube that yields to a chopstick with no resistance anywhere in it, fat and lean alike, sitting in a light sauce. A browned, tightened exterior contradicts that — it introduces a surface that resists, which is the thing the three-hour simmer was trying to eliminate. Air fry it and you get something good, but it is chashu or hong shao rou, not kakuni. That is why the frontmatter says appliances: [dowell].
There are two fair reasons to use it anyway:
- Reheating. If a portion comes out of the fridge and the fat reads slack or greasy, 3–4 minutes at 180°C firms the surface and makes it much more appetising. This is a repair, not a step.
- You prefer it that way. Some people find pressure-braised belly fat unpleasantly soft. If that is you, 5 minutes at 190°C on well-drained cubes is the fix — same caution as
hong-shao-rou.md, sauce goes back on afterwards, not before, or the sugar burns.
Salt, and the liquid
Soy is the only real salt source. No dark soy, no oyster sauce, no miso. Mirin and sake contribute sugar and alcohol, not salt. chicken-stock.md puts a 180 ml portion at roughly 200 mg of sodium, which is negligible on a first attempt. So: 3 1/2 tbsp Datu Puti at 2.65 g salt equivalent per tbsp is about 9.3 g, across a finished 1.1 kg once the fat cap is gone — right on the folder’s 0.8% target.
That is lower than both lu-rou-fan.md and hong-shao-rou.md, on purpose. Those two are concentrated toppings eaten a spoonful at a time over a lot of plain rice. This one is served with more of its sauce, so it lands closer to the nominal number.
On total liquid: 180 ml of stock plus 3 tbsp mirin and 3 tbsp sake is around 270 ml, comfortably above the 3/4 cup rule. PREREAD.md’s rule is a floor to guarantee steam and an argument against adding water, and mirin and sake are seasonings that happen to be wet. Do not scale them up to the traditional 100 ml each — that lands you at nearly 400 ml, and you would spend twenty minutes boiling off the excess you just paid for. Documented here rather than glossed over.
Alcohol needs the open reduction. In a traditional simmer most of the alcohol in the sake goes off in the first ten minutes. A sealed pot evaporates nothing, so it is all still there when you open the lid — raw sake reads sharp and slightly solventy. Step 9 is what clears it, which is another reason not to skip the reduction even if the sauce looks about right.
Where this departs from the authentic version
- Chicken stock instead of dashi or the par-boil water. Folder rule. Be aware this is a real flavour deviation, not a neutral one: dashi is clean, smoky, and marine, while chicken stock is round and fatty. It pushes the dish a step toward the Chinese end of the spectrum. It also fits the folder better —
PREREAD.mdrules out fermented-fish seasonings, and while katsuobushi is not bagoong, the folder has no dashi in it and this is not the file to introduce one. - The long par-boil cut to a 5-minute blanch. Full reasoning above.
- No drop lid (otoshibuta). Its job is to keep exposed meat basted in a shallow simmer. Under pressure everything is submerged and there is no evaporation, so the problem does not exist.
- No daikon. Frequently braised alongside and genuinely good, but
PREREAD.md’s vegetable rule applies — 30 minutes under pressure would collapse it. If you want it, simmer thick slices in the reduced sauce on Sauté for 15–20 minutes at step 9, lid resting unlatched. - No mustard in the pot. Karashi is a table condiment here, exactly as it should be. It also keeps the batch flexible, since it does not affect storage.
- The skin stays on.
PREREAD.mdsays skin comes off in the braises, but that rule was written about chicken skin, which goes pale and flabby without browning. Pork rind under pressure converts to gelatin and sets — it is a different material with a different failure mode. Same rule, opposite call. If soft rind bothers you, buy skinless belly and expect a slightly thinner sauce.
Notes specific to this recipe
- No black pepper and no garlic. Pepper is suppressed by sweetness per
PREREAD.md, and garlic simply is not in this dish. This is the one recipe in the folder where the house instinct to add more garlic is wrong. - Cut big. 5 cm cubes look excessive raw and are correct — belly loses a lot of volume as fat renders, and small pieces fall apart entirely at 30 minutes. If you cut to 4 cm, drop to 25 minutes.
- Reduce less than you think. The failure mode here is over-reducing into something salty and sticky. It thickens further as it cools, and the sauce is meant to be spoonable.
- Reheat covered in the microwave. This is a saucy dish, so the standard
PREREAD.mdrule applies. The air fryer is the exception noted above, and only when you want the surface firmed. - Freezes well. Gelatin and pork fat freeze cleanly and there is no dairy. Freeze the cubes in their unreduced liquid and do the reduction after thawing — you get a better sauce, and it saves you guessing how much to reduce on day one. Freeze half on day one per
PREREAD.md. - Serve with something plain and green. Microwaved bok choy or blanched spinach. This is rich enough that rice alone is not sufficient contrast.
Next-time improvements
Nothing yet — untested. After the first cook, record:
- Whether 30 minutes at 5 cm was right, or whether the cubes had already collapsed.
- How much fat came off the cap, and whether the finished dish still read greasy — if so, try a 20–30 minute blanch next time rather than changing the braise.
- How long the reduction took before the sauce read right, and whether you over-reduced it.
- Whether the sake read raw after the natural release, and whether the open reduction cleared it.
- Whether chicken stock instead of dashi was noticeable — this is the deviation most likely to be felt.
- Whether 3 1/2 tbsp landed at the right salinity, tasted with rice rather than off a spoon.
- How the eggs were handled and whether making them fresh per portion was actually as easy as it sounds here.